
Elastic Map Service nowadays comes with Slovakia regions , which you can happily use with your geospatial data. If you want to have higher precision of Region’s shapes, or you do need to implement the level of ‘districts’ (okresy) or go to the detail of a single city/town, you must use custom map layers. Using different layers is considered a basic task for any GIS application. Possibility to add custom layers in Kibana Maps is available since the introduction and is improving with every release.
Intro and the data
Kibana Maps allows you to work with geospatial data in your documents. Besides showing the location on the map, layers with geo shapes will allow you to add more functionality like aggregation over shapes, connect documents to specific locations, and more.When I was working with geospatial data set from Slovakia, I came across the need to use better precision and present my documents in a map with
resolution as low as city shapes. This requirement is no issue when you have data at hand that are available in such format so they can be used in Kibana Layer. They can be in different formats, and typically are in the format of shape
file .shp or GeoJSON
format.
Often, the task to find the right geospatial data is very hard, but I found Slovakia’s geospatial data in Geoportál free to download and use.
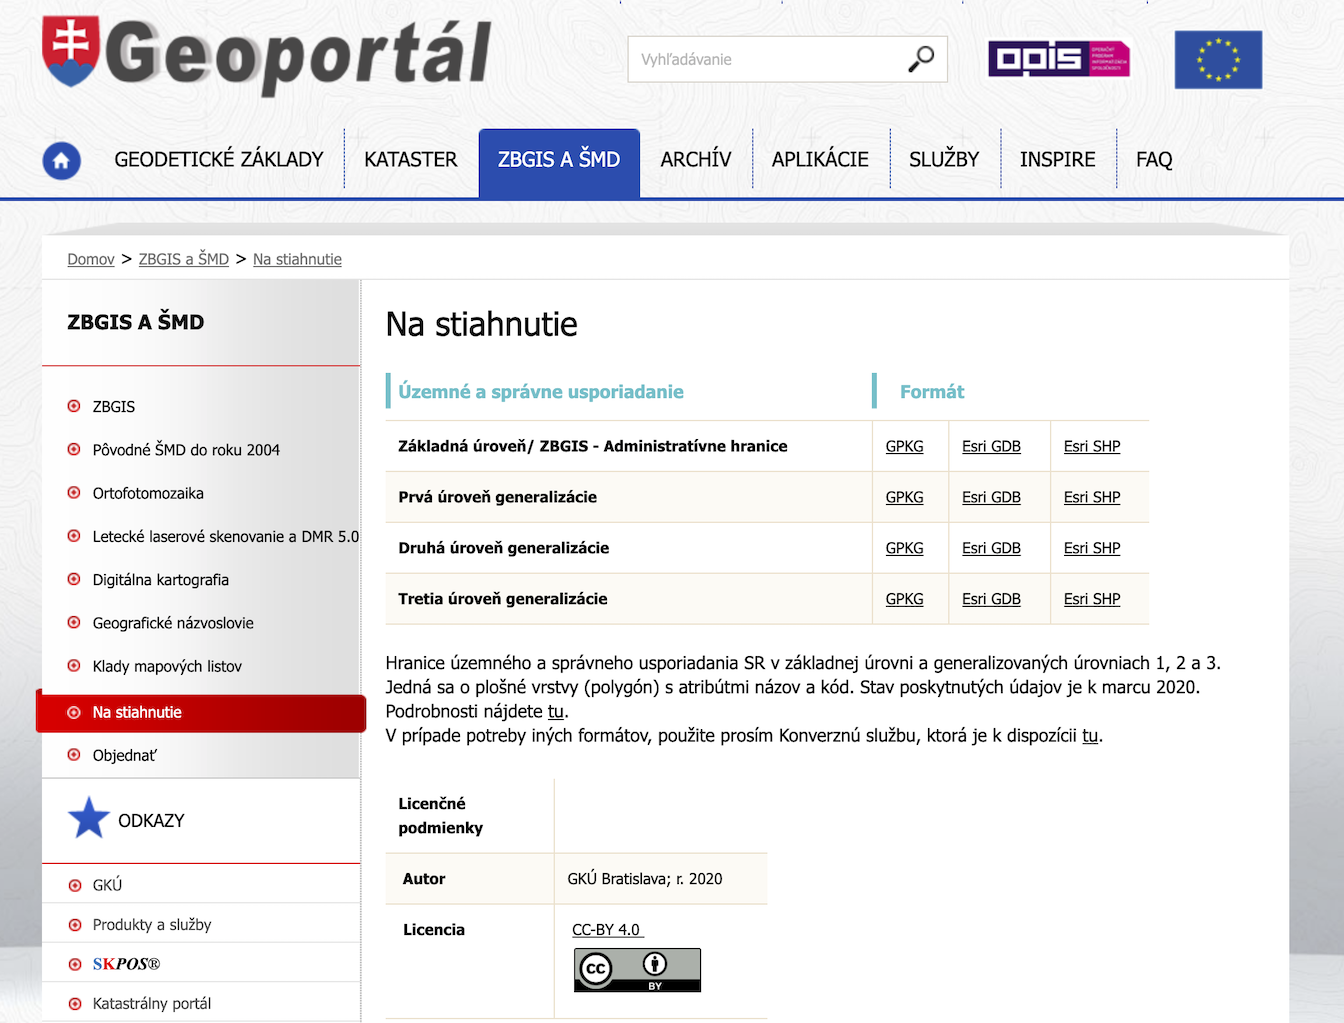
Geoportál
How to import geospatial documents
Download the package for First level of generalization (Prvá úroveň generalizácie) using the link Esri SHP. The selected level of detail has a reasonable size and precision.
Once you unzip the package, the content consists of different file types. We are interested in shape files with .shp file extension. Make sure you can see all the shapefiles, as shown below. Note, there are more files that are the content of the zip package. Do not touch them or delete them.
Leave them as they are. They are essential for the GDAL library.
$ ls -l *.shp
-rw-rw-rw-@ 1 user  group   495124 Mar  2 10:15 kraj_1.shp
-rw-rw-rw-@ 1 user  group  8084120 Mar  2 10:15 ku_1.shp
-rw-rw-rw-@ 1 user  group  7325616 Mar  2 10:15 obec_1.shp
-rw-rw-rw-@ 1 user  group  1400224 Mar  2 10:15 okres_1.shp
-rw-rw-rw-@ 1 user  group   161820 Mar  2 10:15 sr_1.shp
To import geospatial data into Elasticsearch and to be able to use them in Kibana, use GDAL library. I have a different post dedicated to just how to set up the GDAL library using a wrapper script around the latest Docker image. Please, read and follow the post if you do not have the latest version of GDAL or never used the library before.
We will use the latest GDAL library. You can read about options either in the official GDAL documentation or read Elastic blog post explaining in more depth how to work with the library.
$ ogr2ogr -lco INDEX_NAME=kraje -lco NOT_ANALYZED_FIELDS={ALL} \
  "ES:http://localhost:9200" "$(pwd)/kraj_1.shp"

$ ogr2ogr -lco INDEX_NAME=obce -lco NOT_ANALYZED_FIELDS={ALL} \
  "ES:http://localhost:9200" "$(pwd)/obec_1.shp"

$ ogr2ogr -lco INDEX_NAME=okresy -lco NOT_ANALYZED_FIELDS={ALL} \
  "ES:http://localhost:9200" "$(pwd)/okres_1.shp"
With the wrapper:
$ /path/to/dogr2ogr -lco INDEX_NAME=kraje -lco NOT_ANALYZED_FIELDS={ALL} \
  "ES:http://localhost:9200" "$(pwd)/kraj_1.shp"

$ /path/to/dogr2ogr -lco INDEX_NAME=obce -lco NOT_ANALYZED_FIELDS={ALL} \
  "ES:http://localhost:9200" "$(pwd)/obec_1.shp"

$ /path/to/dogr2ogr -lco INDEX_NAME=okresy -lco NOT_ANALYZED_FIELDS={ALL} \
  "ES:http://localhost:9200" "$(pwd)/okres_1.shp"
In case you need to connect to secured cluster do not hestitate and use authentication http://user:passw@localhost:9200.
$ ogr2ogr -lco INDEX_NAME=<index_name> -lco NOT_ANALYZED_FIELDS={ALL} \
  "ES:http://user:passw@localhost:9200" "$(pwd)/shape_file.shp"
The above commands will create three new indices in your Elasticsearch cluster. Use simple _cat API to check.
GET _cat/indices/obce,kraje,okresy?v
health status index  uuid   pri rep docs.count docs.deleted store.size pri.store.size
yellow open   okresy uidA   1   1         79            0      5.1mb          5.1mb
yellow open   obce   uidB   1   1       2927            0     26.5mb         26.5mb
yellow open   kraje  uidC   1   1          8            0      1.8mb          1.8mb
Layers in Kibana Maps
When the import is finished, you are ready to use your fresh geospatial data in Kibana Maps-
Navigate to Kibana
http://<IP or 127.0.0.1>:5601and in the upper left menu go toManagementapplication -> Stack management -> Index pattern . -
Create Index patterns for all indices you just indexed. Do not use
Time Filterfor your index patterns. They are static data that do not change over time. Follow the example and create a dedicated Index pattern for each index.
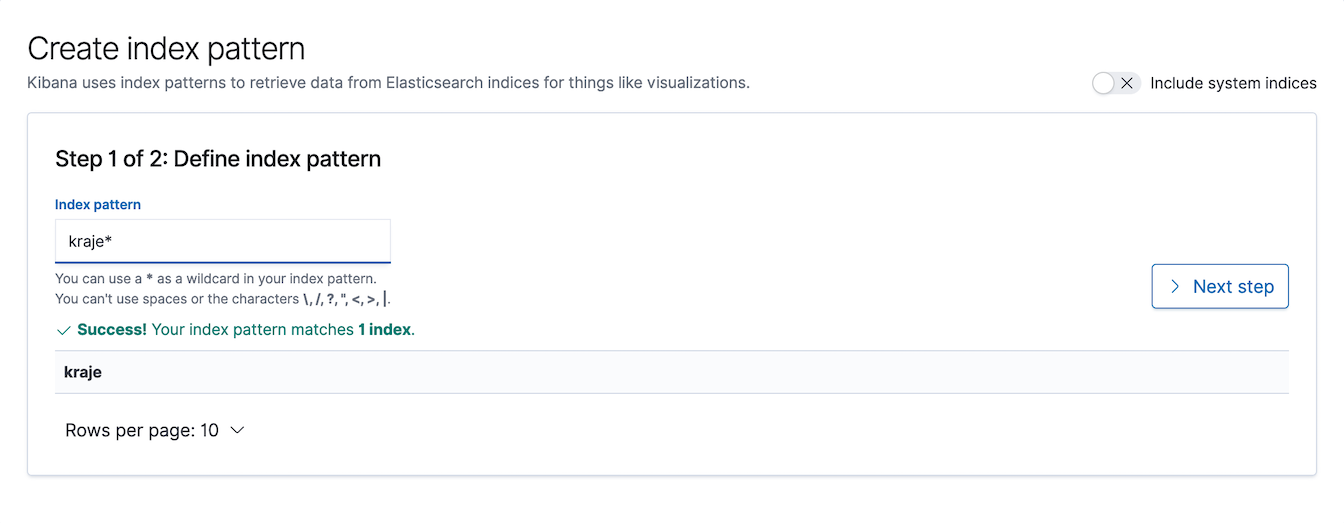
Create Index pattern
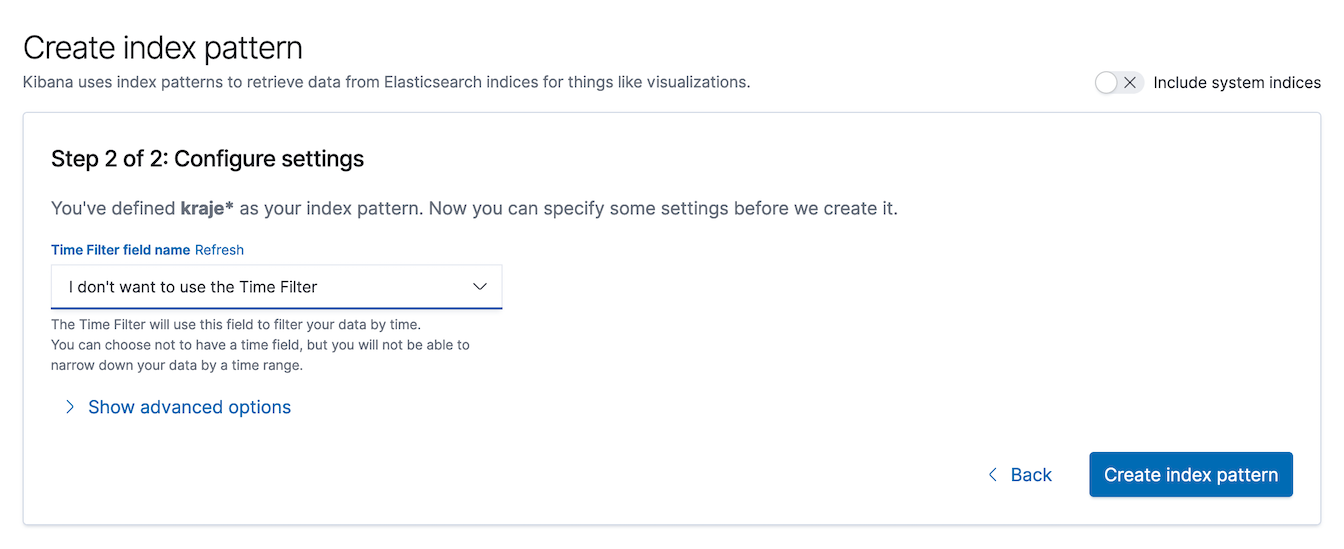
Configure Index pattern
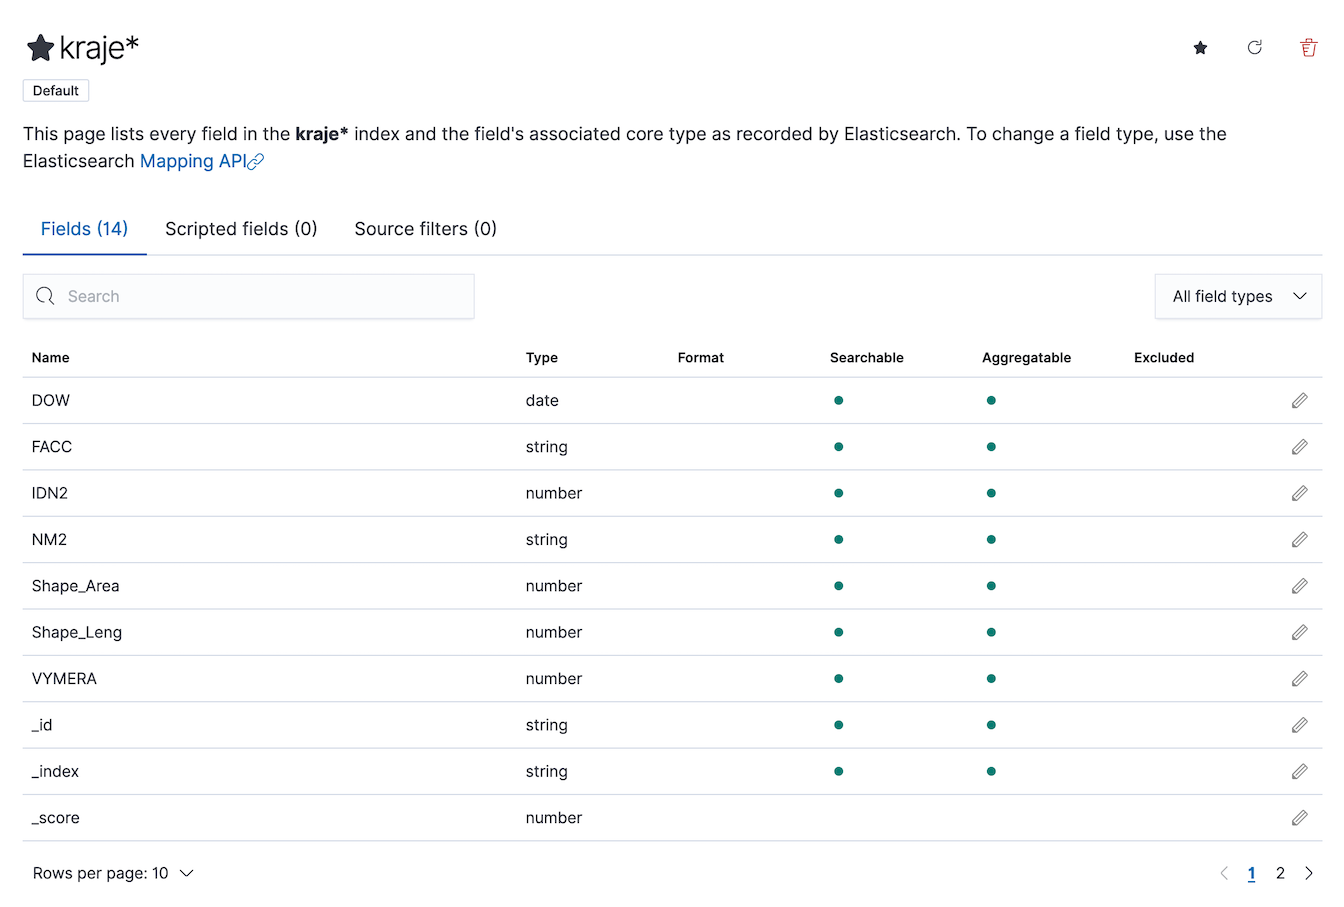
Detail of the Index pattern
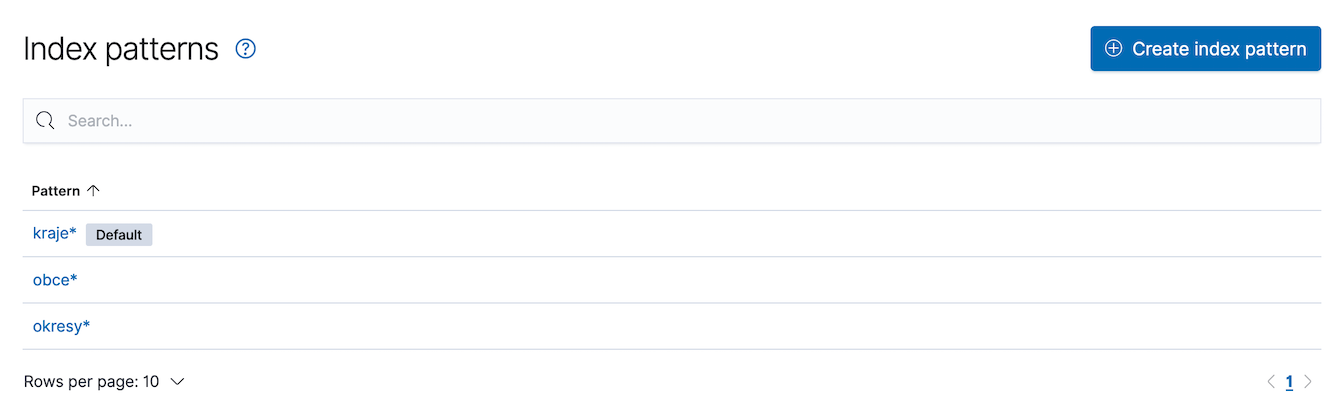
List of Index patterns
- Open Maps application in Kibana and you will see an empty map if this is your first one.
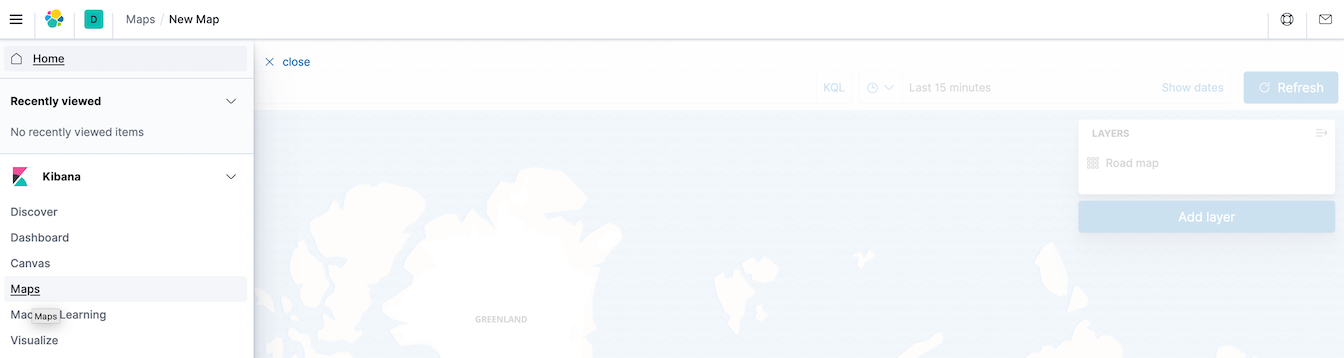
- On your new map, go ahead and
Add layer.
Add layer
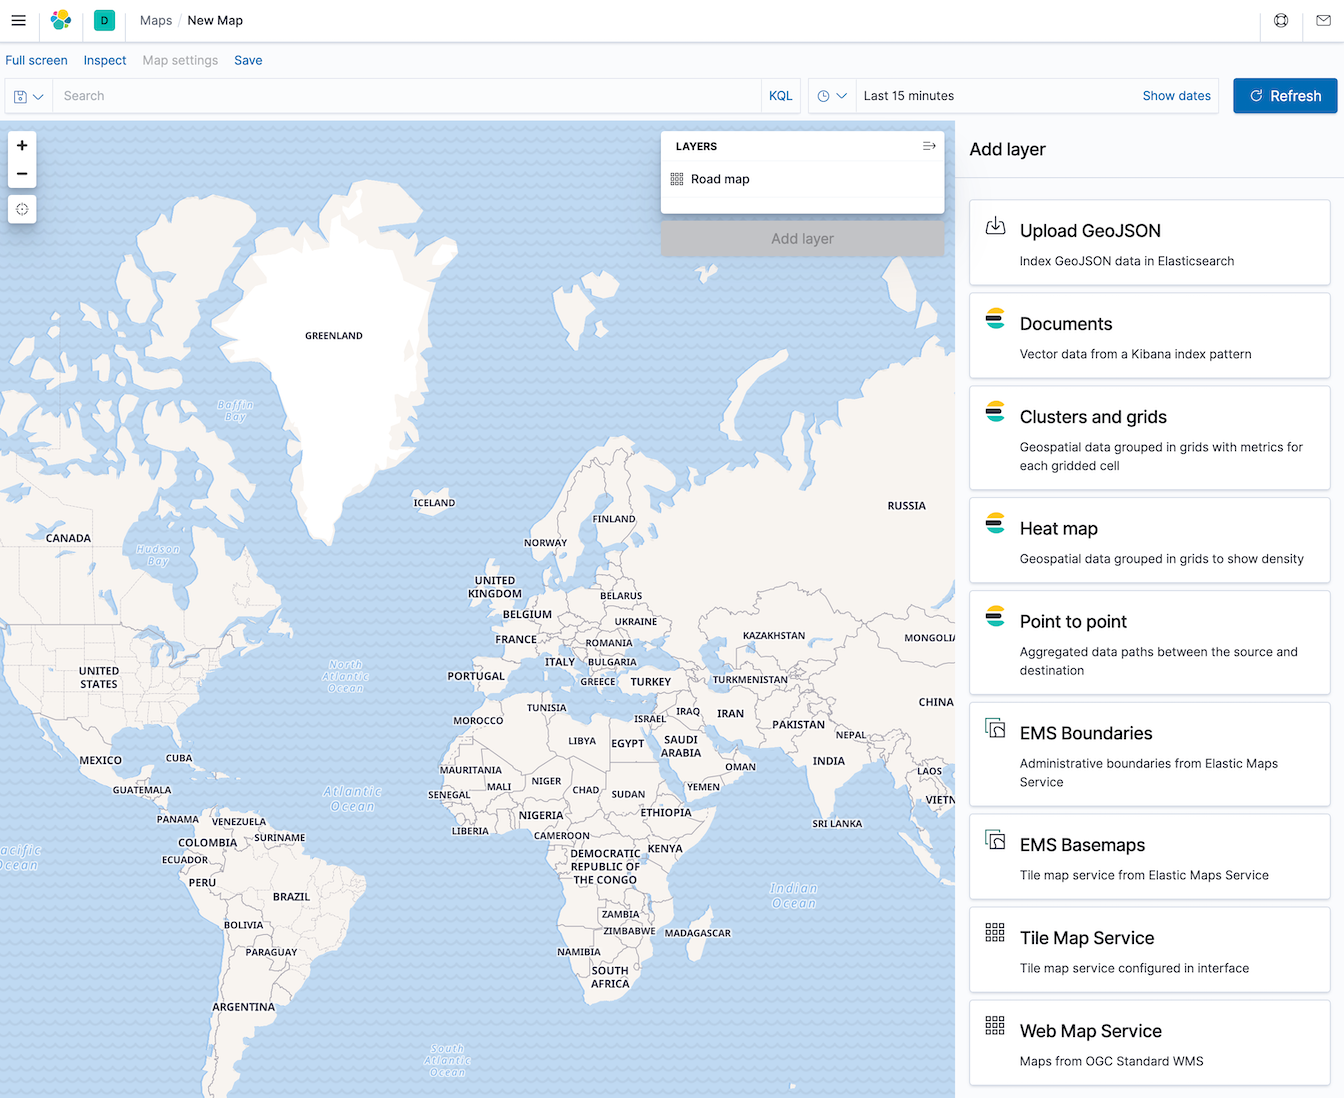
- Choose
Documentsfrom the list to show on your Layer. Do not forget to Save the layer after youAdd layerbefore moving to the next layer.

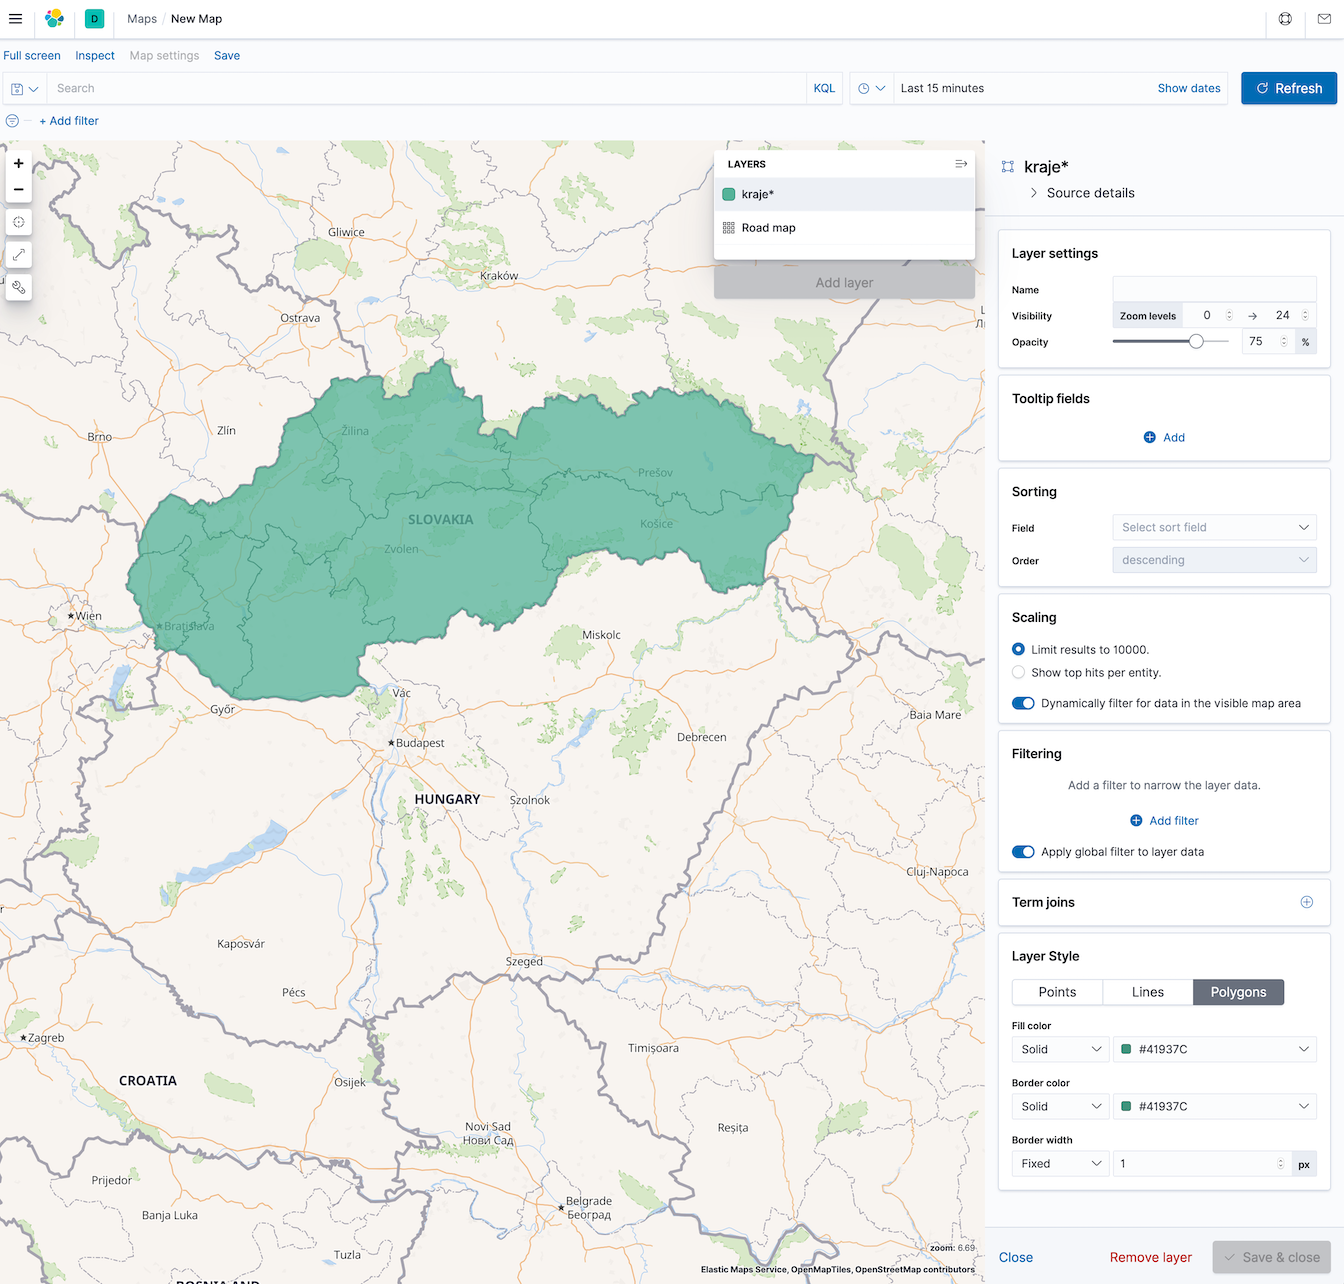
- Repeat the process for all 3 indices and enjoy 3 layers of geospatial data.
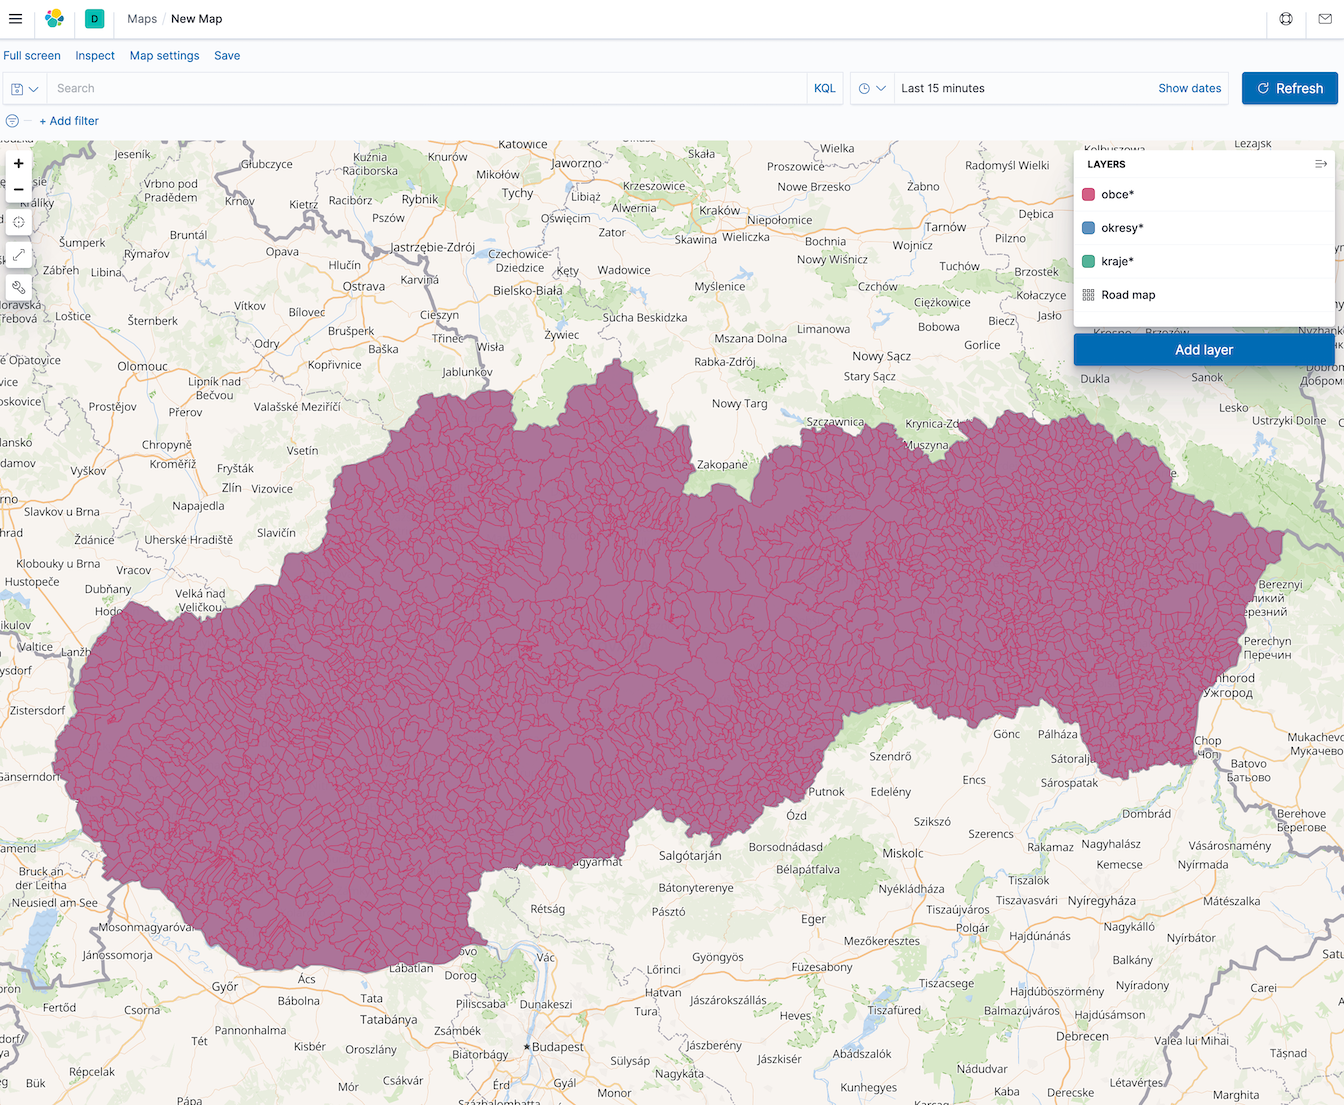
All document layers
You are now ready to use your newly imported geospatial data with Kibana Maps. Please check the documentation for more information on how to navigate or configure in detail your layers. I plan to post more articles in the future on the topic, so come back and check the new content.
Let me know if you have learned something new, or if the hands-on post is understandable. Feel free to comment or suggest me how to improve the content so you can enjoy it more.